 .
. 
NOTE! THIS PAGE WAS DESIGNED FOR OUR GROUP OF VOLUNTEERS WHO ARE MAKING FACE COVERINGS. We don’t pretend that we know any more than the other well-meaning groups out there trying to help. Evaluate several sources of information before you choose which face covering to make. THANKS!
(This is evolving each day, so check back once in a while)
A quick cautionary tale…I cut up several dozen pieces out of an old sheet set and started sewing BEFORE I tested it for breathability. Turns out, this fabric isn’t breathable at all! (Must have some synthetic mix in with it – not 100% cotton.) Test your fabric before beginning.
Face Covering Pattern Info
We had a seamstress evaluate patterns and materials and this is the design our group of volunteers is working with. The video below has the instructions and shows the use of a nonwoven fabric filter, but we are using four layers of fabric and leaving the bottom unsewn so that a filter may be inserted as the material becomes available. If nonwoven filter is available, we’re still using a denser cotton than the light weave scarf she shows in the video. A different color for front and back is helpful so that users can easily keep track of which side is which.
SPECS:
SANITATION: Make your own face covering first and wear it when sewing the others. Don’t try your donated face coverings on or handle them unnecessarily. Check with your recipient organization to see if they would like them washed after manufacture by you or if they plan to do it at their facility. Wash hands frequently while working and don’t touch your face, glasses or face covering. It may be helpful to put finished face coverings in a bag with specs on how they were made, seal the bag then date it. That way they can be used after a 3-day waiting period without worry.
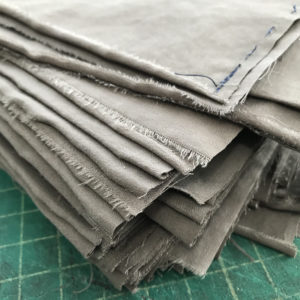
FABRIC: Tightly woven but breathable cotton cut to 8″ x 8″ or 8″ x 9″ for a little extra width. Be sure fabric is pre-washed.
Optional Nonwoven filter material shown in video: You might find that you have shoe bags, disposable painter’s overalls or other items that contain this material. We tested it for washing, and drying at high temps, even pouring boiling water on it, and it held up fine. BUT, it WILL MELT if you use an iron on it, even through other fabric, so don’t press the face covering it or you may ruin it or make it ineffective without realizing it, especially if you’re put the nonwoven between two pieces of other fabric. If using sew-in interfacing, do a test first. We’re recommending making with fabric and being sure to leave the bottom seam unsewn so that as material becomes available the nonwoven filters can be inserted.
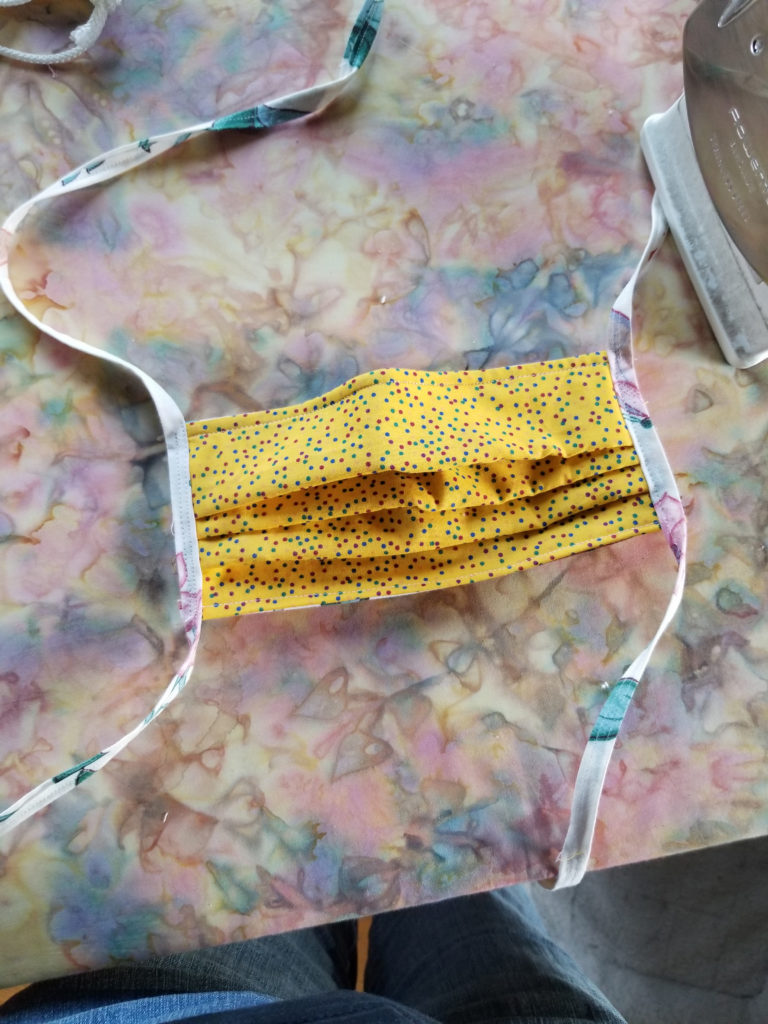
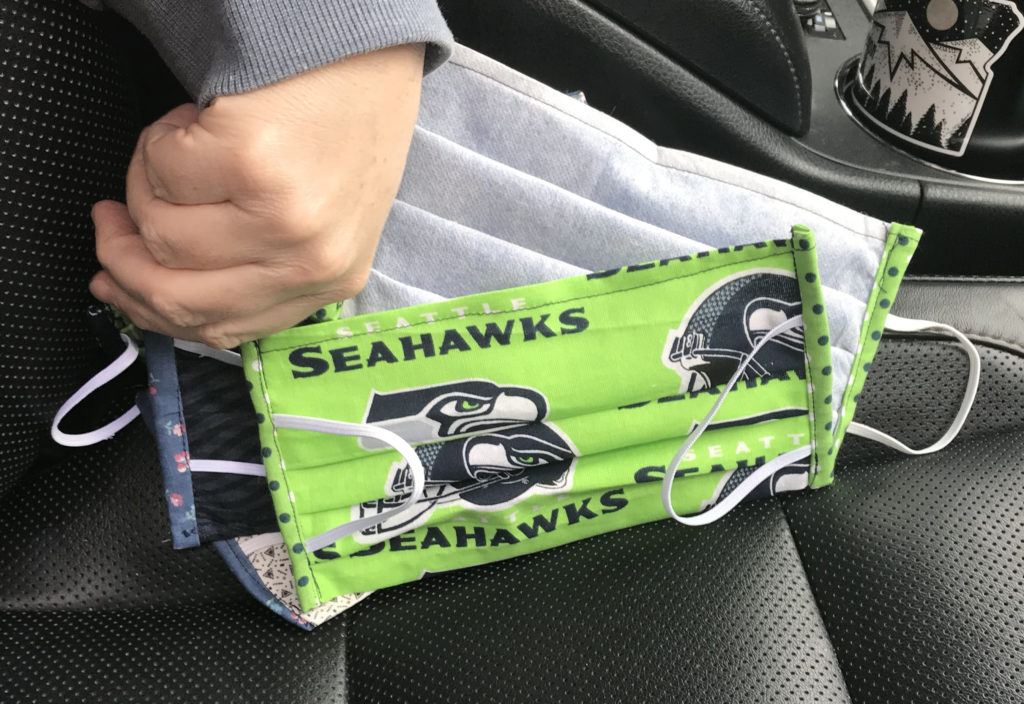
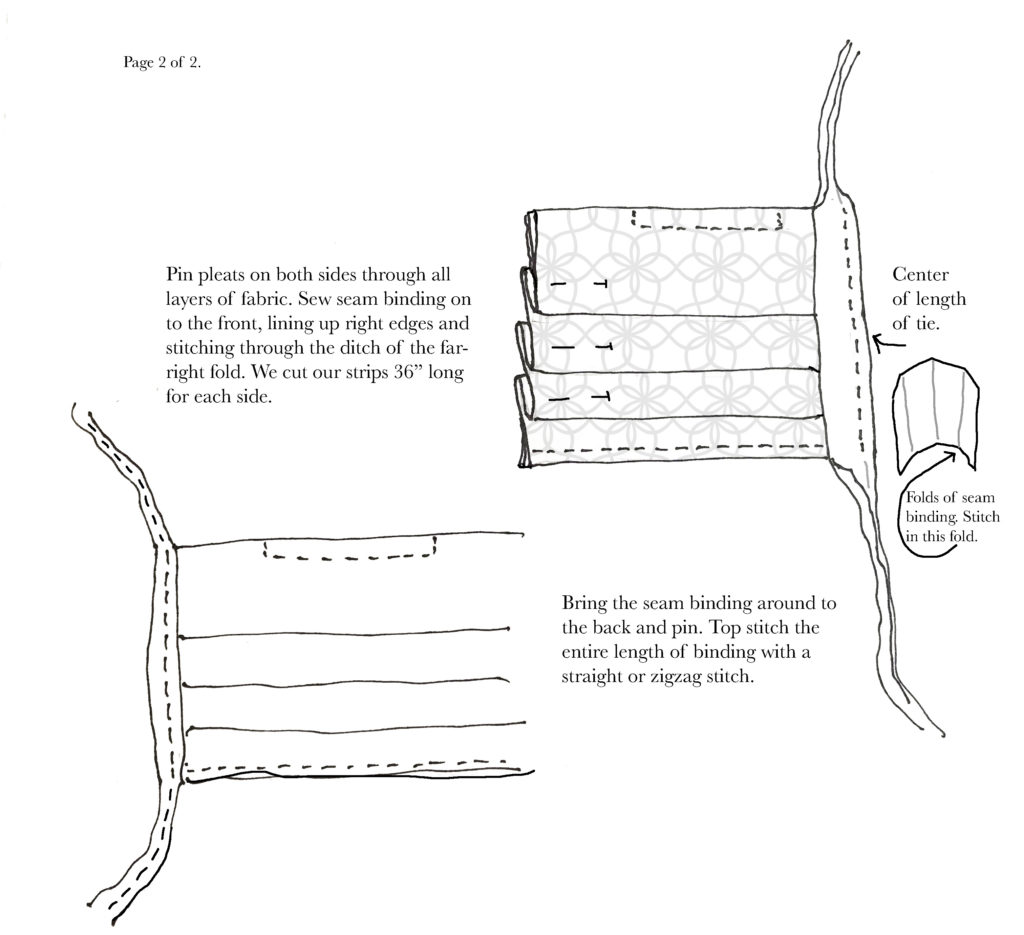
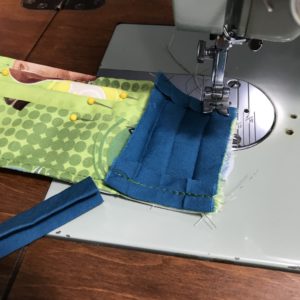
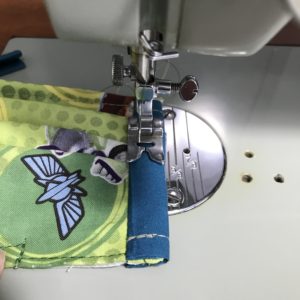
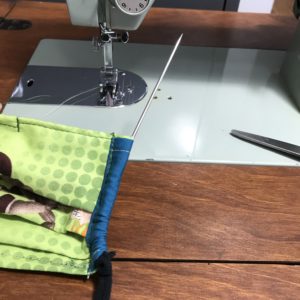
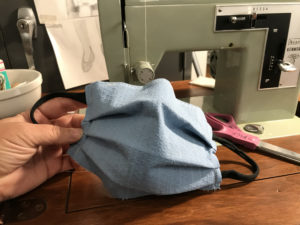
TIES: Instead of elastic, most of our group is using fabric ties as shown in the photos above. These are constructed from 2″ wide strips that are folded lengthwise to the middle, then in half to create 1/2″ ties that are overstitched. Each face covering needs two 32″-36″ ties, which are sewn onto the pleated sides as shown in the photo above. Fabric ties aren’t as convenient for healthcare workers to take on and off, but reduce the chance of latex allergic reaction and address the elastic shortage.
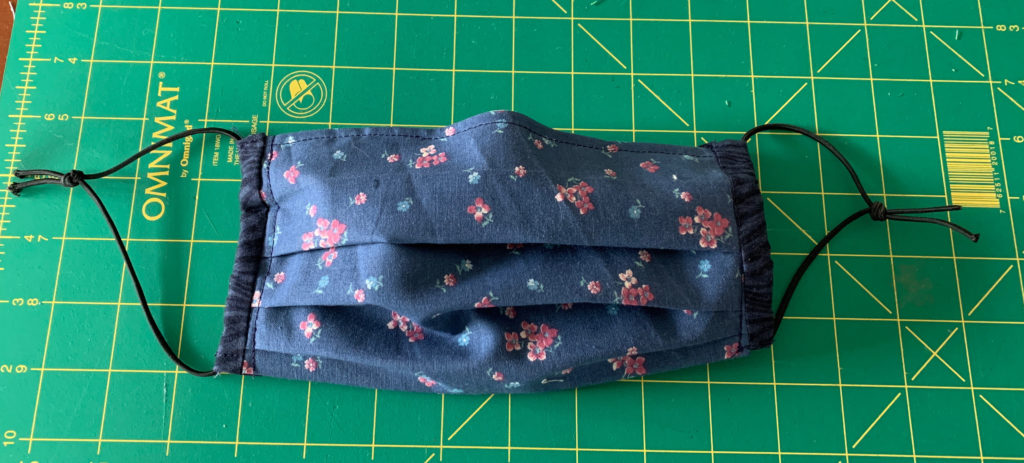
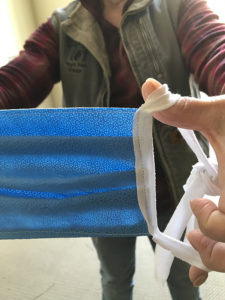
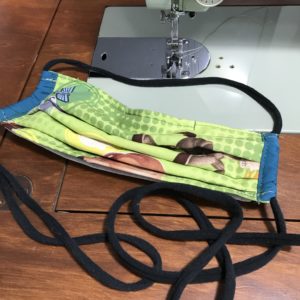
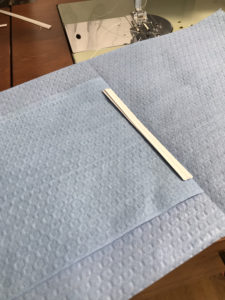
We did get a bit of black elastic chord that has been used in some, threaded through a small sleeve on each side and loosely tied for laundering, then the wearer can adjust and tie as needed. It has all been distributed, but we wanted to share this photo in case others were working with a similar material. Some people found the pleated edges too bulky for tuning over into sleeves for ties (elastic, cloth or other cord) so they used a 2″ wide strip to create a pocket.
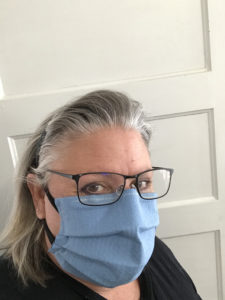
NOTE: I made two face coverings for my volunteer at work and I because we had to do a job that required us to be in close quarters, and the elastic cord didn’t work well for me, even when I adjusted the tie lengths. I ended up tying a ribbon to each loop and tying it at the back of my head. The input we got from one physician today is that cloth ties are preferred for him.
Some people also used regular 1/4″ flat elastic, and we’ve seen some with the elastic attached at the top and bottom of the face covering and some with the elastic more at ear-width.
BREAD TIES and Nose Wires: (this will make sense when you watch the video) If you need bread ties for your group, contact Roberta at 541-310-7413. Many groups are leaving this step out, but we felt a better fit would be helpful. I’ve found that the best fit comes with a length of 19-20 gauge galvanized aluminum wire (may be doubled if it feels like it needs it) that’s rolled on the ends to prevent it from poking through the fabric.
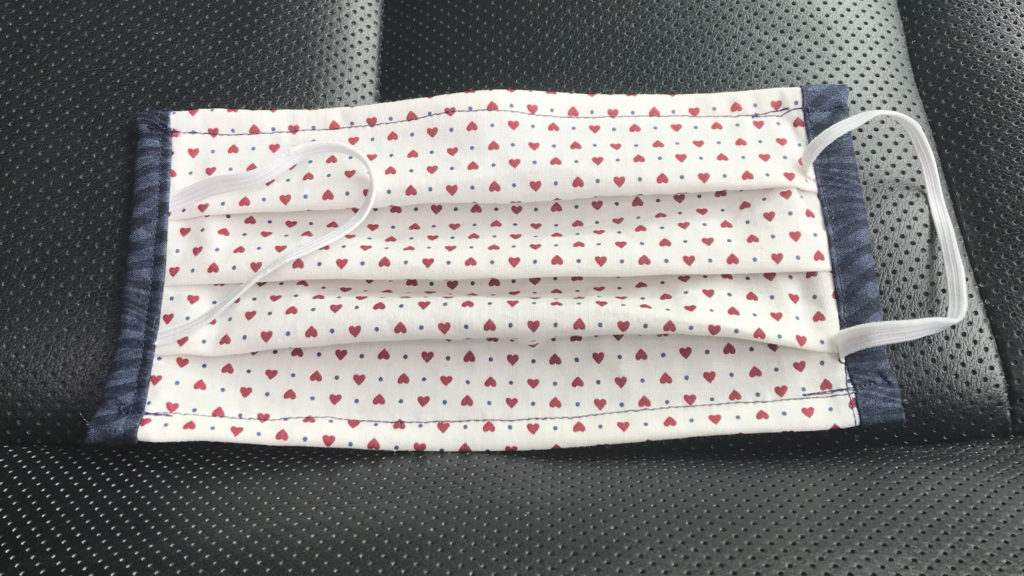
PLEATS: Pleats should be sewn so that they are in the ‘down” position when the face covering is worn. This prevents particles from collecting in the pockets. Even though the pockets largely disappear in the front when worn, they still can catch droplets and germs on the sides, where people are most likely to accidentally touch when removing the face covering.
LABELING: It might be helpful for each batch to contain a note stating materials used (# of fabric layers, whether the nonwoven filter material was used, etc.) If preparing a face covering for others, remind them not to iron if it has the nonwoven material, advise on proper handling (only by straps), and care. Someone also recommended adding whether they were sewn in a pet-free home or not.
A Basic Instruction Video. (See notes above, and sorry about the YouTube ads, some of them are a bit wacky and beyond our control). Note that we don’t recommend gauzy fabric as shown in this video, or the single fabric layer. Read all the instructions on this page to get the full picture.
We also made a quick video for how to measure the face covering pleats, which for me was the clumsiest part of the project.
Learn better with written instructions?
…And here’s the style with the t-shirt ties:
Not sure how to cut the t-shirts most efficiently? Try this…
Here’s a photo of the t-shirt ties simply wrapped around the edge of each side of the face covering and stitched through all layers. Loose ties are kept unsewn. Seems to be sturdy and functional. THANKS June!
Here’s another option for adding the t-shirt ties. I found that this provided an excellent fit, especially when paired with elastic shock cord instead of the t-shirt ties.
Here’s a video I put together for a couple friends fleshing out this idea more clearly, and showing my favorite combination so far (4/18), side sleeves with shock cord:
Here’s a tutorial on how to use filtering shop towels for a face covering:
We also experimented with adding an additional layer of filtration.
 .
.  .
. 
_______________
We recently made some with this pattern (below) too. You can print her template at THIS PAGE You have to scroll through LOTS of ads, so be prepared. I hid the wire sleeve between the two layers, using nonwoven for the face-facing side, and used a strip of 1/2″ homemade seam-binding, hemmed top and bottom, for the sleeves for the ties (see above). 1″ t-shirt ties work GREAT with this as long as they are pulled out to roll nicely.
Here’s a great video (below) for making a face covering if you don’t sew. Seems like you could roll the top down around a bread tie or a 4-5″ section of pipe cleaner to make the nose fit better. There are caveats: People should make sure their DIY face coverings are clean (a dirty mask might be worse than no mask), and they shouldn’t use the face covering as an excuse to violate social-distancing orders. Get in the habit of only touching the ties of your face covering.