Painting with Arlen: Project #1
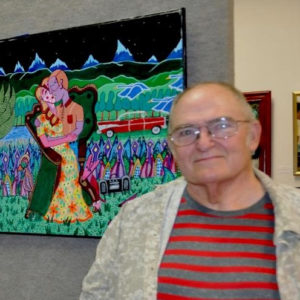
Arlen Clark is one of our favorite regional artists. You may have seen one of his exhibits in the East Oregonian Gallery and he was invited to exhibit work in one of the 2017 Oregon Biennial satellite exhibits by curator Michelle Grabner. His students are always asking him what he goes through when he makes a painting, so he has generously put together step by step instructions that we’ll add to each day. Arlen hopes that this will inspire others to paint or draw. inspire others to paint or draw.
DAY ONE
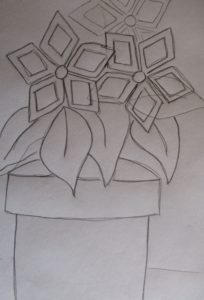
1. Make a pencil drawing.
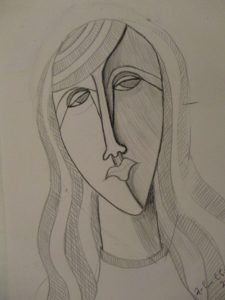
2. Use tracing paper over the drawing.
3. Use transfer paper to copy it to the canvas. (You can also just sketch lightly directly onto the canvas.
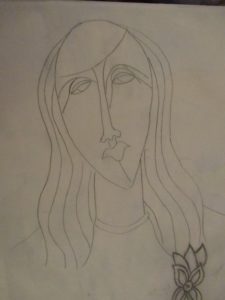
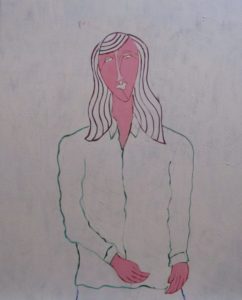
4. Paint an outline. Any color will do except white because the canvas is white.

5. Start blocking in the outline with color.
DAY TWO
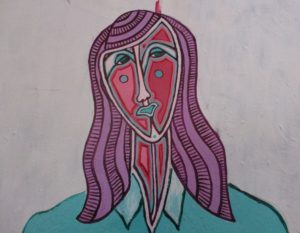
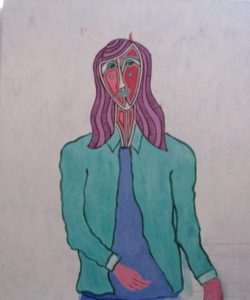
“Today I concentrated on the lady’s face. I use a style of painting similar to Cloisonnism which used bold flat colors separated by dark contours. I do use flat colors, but I use other colors besides black for the contours. Artists Emile Bernard, Paul Gauguin, Paul Serusier, Louis Anquetin painted in this style beginning in the late 1880’s in Pont Aven, Brittany. Paul Gaugin’s painting the Yellow Christ was the major masterpiece in the Cloisonnism style. See it HERE.
“For the face I used 5 colors—Titanium White, Quinacridone Rose, Athroquinone Red, Mauve and Phthalocyanine Green. The canvas is 24″ X 30″. Tomorrow I will work on her clothes.”

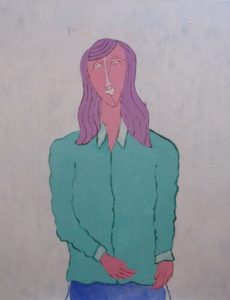
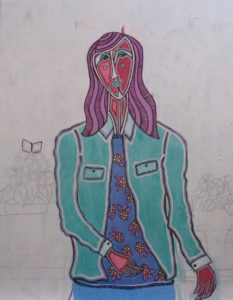
DAY THREE
1. I moved the left arm by painting over it with white and re-doing the outline and blocking.
2. I opened up the jacket to reveal a white sweater.
3. Color was built up on the jacket using white and phthalocyanine green.
4. I changed the white sweater to a blue by using white and athraquinone blue.
5. I outlined the jacket with white, phthalocyanine green and mauve on the outside.
6. Two pockets were added to the jacket.
7. Finally I worked a little on the hands.
8. Tomorrow I’ll work on the hands and the sweater then start thinking about the background.
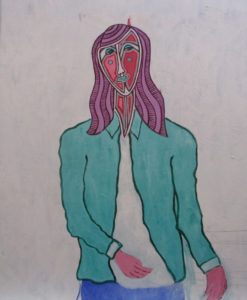
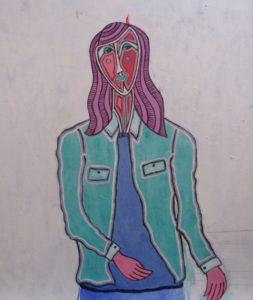
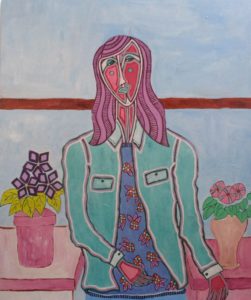
DAY 4
1. I finished the hands.
2. I added flowers and leaves to the sweater–Titanium white and cadmium orange for the flowers–mauve for the
leaves.
3. Blocked in two tables–any color will do
4. Blocked in a pot on each table–it doesn’t have to be a pot, a vase or basket will do too.
5. Started working on the flowers for each pot. I chose violet and red for the flowers, But again any color will do.
6. Blocked in the wall with manganese blue and titanium white.
DAY 5 – COMPLETED!
I painted the final little details on the pots and flowers, and I finished the wall then signed it.
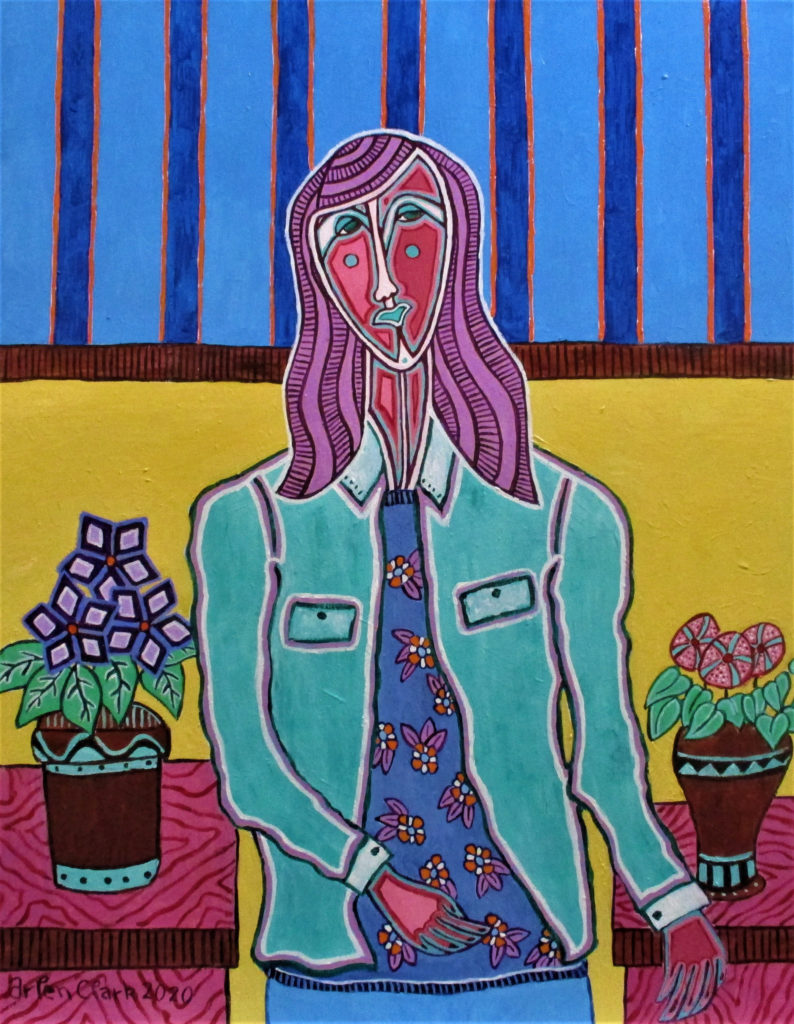
I tell the artists in my class that “if you can draw, you can paint and if you think you can’t draw, you can still paint.” Get some acrylic paint, water colors, colored pencils or get a sketch pad and do some sketching. Don’t do one drawing, do 4 or 5 and pick the one you like best. Don’t give up, all you can do is improve and you will.
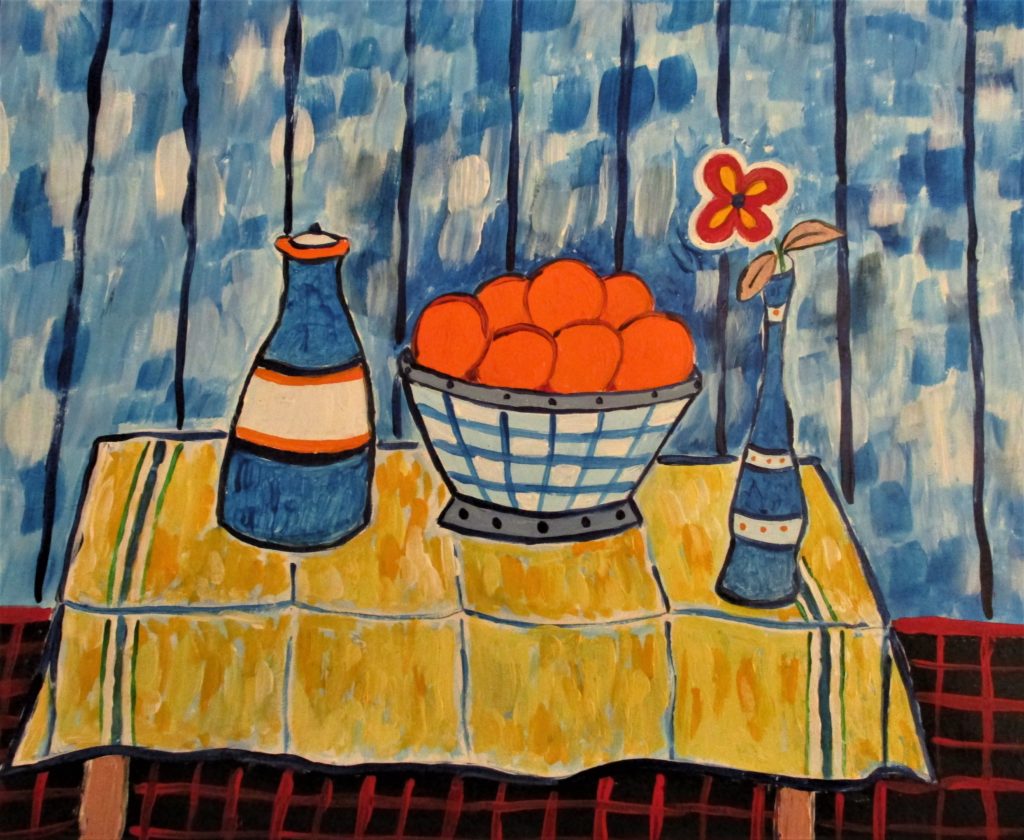
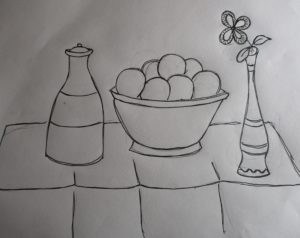
Project #2: Still Life
This should be an easy and fun still life. I chose oranges in a blue bowl, a vase flowers and some kind of a jar on a table.
DAY ONE:
1. I started with just a simple line drawing on a piece of computer paper then transferred to an 11 X 14 mix media
paper that could take acrylic paint. Wal-Mart was out of canvas this morning so I am using paper.
2. I used brush strokes are rather quick and very free and you are free to use what ever colors you wish, but
remember to use complementary colors–Orange & Blue, Red & Green, Yellow & Violet or Purple. Yellow also
works well with blue too. Van Gogh said you can’t have blue without yellow and orange.
3. I used manganese blue for the vase and the jar outline with anthraquinone blue. The table cloth was first colored
with a mixture of white and manganese blue and when it was dry I used white, dairylide yellow and aureoline
(Yellow). I am aware that you probably don’t have the blues and yellows I just mentioned. So use a dark blue and
a light blue (Just mix it with some white). For the yellows, use a yellow mixed with white for a lighter yellow, for
the deeper yellow mix it with just a tiny bit of orange or red, but try to keep it yellow.
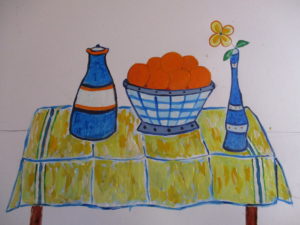
DAY TWO:
1. Changed the flower to red.
2. Created a background using quick strokes with white and blue and a few dark blue lines.
3. Painted the floor black and added diagonal & horizontal lines in red to create a look of tile and lightened the table legs.